Introduction
In my ongoing quest to decrease the amount of time that I spend doing chores, I recognized the need to be able to perform an activity without spending time moving to where the activity needs to be done. This need serves as the foundation for my final project idea: a robot that can draw using my hand movements as input. Ideally, this will allow me to mime drawing while far away from a chalkboard yet still have my drawings be expressed on the board.
Components
This project will require two main components: the input device (to be used on one's arm) and the drawing device (to be attatched to a chalkboard).

Fig 1. 2D Model of Problem
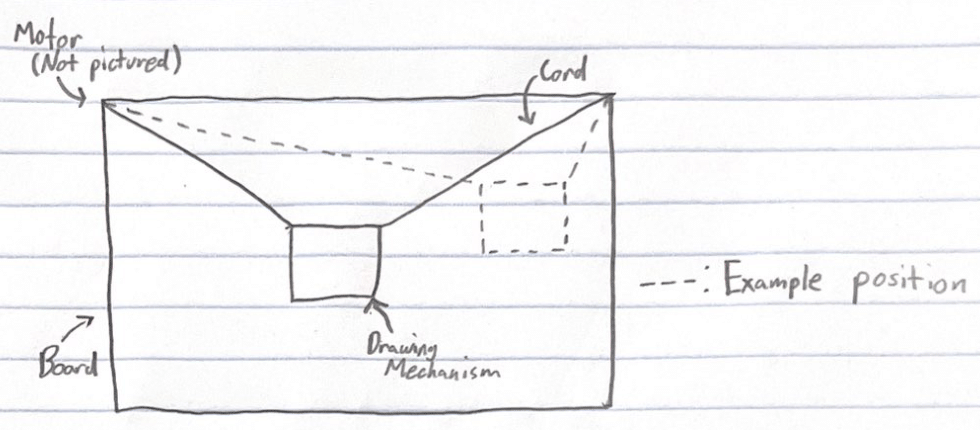
Fig 2. Drawing Apparatus Design V1
In Figure 1, I constructed the input device in blue. While I do not have a specific design for it yet, I believe that it will provide angular data (similar to an arm rotating). From this device, I have constructed dotted lines representing how certain angles will correspond to certain points on the blackboard (red).
In Figure 2, I drew my working design for the drawing apparatus. While I considered mechanisms that use vertical and horizontal movement, I eventually settled on a design that uses suspension. I chose this design with the hopes that it will more easily navigate curves as opposed to straight lines.
Roadmap
In order to finish my project on time, I have split it up into different parts to be completed separately. Each component and one major challenge that I anticipate with it are listed below:
- Develop the container for the chalk. It must be able to exert enough pressure on the board to make marks.
- Construct the apparatus to move the container made in (1). It must be able to cover the entire board.
- Design an input device to lay on the user's arm or wrist. It will need to be able to convert angles (spherical) to coordinates (planar).
- Create a program to communicate between the input device and the drawing mechanism. This will need to be the last step which puts a time constraint on the project.

Fig 3. Chalk Container Design V1
Figure 3 demonstrates how a weight at the "back" of the chalk container could exert a limited amount of force on the board in front of it. The amount of force will be determined by how far back the center of gravity of the container is and how much weight is added. I will attempt to test this on Day 5, once we begin using the 3D printers.